 |  |  |
|---|---|---|
 |  |  |
 |  |  |
 |  |  |
 |  |  |
 |  |
Why Sheryl Nome?
The cowgirl or "love slinger" version was a surprising direction for me to go with for Sheryl. Not that it's a surprise for me anymore, but that I have SO many other Sheryl outfits that I've wanted to do for much longer! So for me to have pulled this one out of thin air was somewhat impulsive, but satisfying nonetheless! It only appears in one movie, and of course some art books and merchandise, but it's not one of her more popularly known ensembles. I still had a blast making it though!
Costume Stats
Started: December 2012
Completed: May 2013
Status: active
Wig by: Cosplay-Wig
Worn at: Anime Central 2013, SabotenCon 2021
Awards: Runner Up Journeyman - Anime Central 2013
About This Costume
Sheryl Nome's cowgirl outfit was a pretty challenging one, but quite fun to make, and even more fun to wear! The whole outfit was patterned by me using flat patterning and draping techniques.
The blouse is made from Casa satin and has hand-stitched trims and ribbons. It zips up from the back, since the wig covers it, so no one will seeeee. The vest and skirt are made of microsuede, and the vest is lined in a matching shade of peach skin. I paid attention to the small details in the skirt and vest, such as the laced vents on the skirt, and the functioning buttons on the vest, as well as buckle and strap on the back.
The gloves, stockings, and neck bow were also all created from scratch by me. The boots and hat were heavily altered. For the boots, I shortened the calves, painted the heels and the hearts, and added custom tassels. I also used the straps that were previously wrapped around the boots to serve as the side strap. The hat is covered in glitter, and has a hot pink suede band with a bedazzled heart buckle. The buckle is actually a children's heart bracelet, haha.
Lastly the belt/holster were made out of interfacing and have hand installed grommets. The guns were altered from pistols I had already, and painted pink like Sheryl's!

Why Sheryl Nome?
Macross Frontier is one of my favorite anime to this day. Action, sci-fi, romance, humor, pop stars- what's not to love? Sheryl was always a character that I thought I could never pull off, even though I admired her so SO much. However, I did her Star Date outfit because it is so cute, and wanted something simple and comfy to wear, and I was impressed at how I felt in the costume! It encouraged me to want to do even more Sheryl Nome looks!
Costume Stats
Started: March 2012
Completed: May 2012
Status: retired
Wig by: Cosplay-Wig
Worn at: Anime Central 2012, AnimeWorld Indy 2012
Awards: none
About This Costume
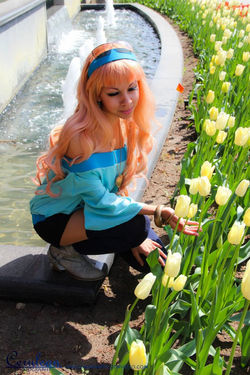
This one was mostly found item, actually. The shorts, socks, and boots were all bought and unaltered. The jewelry was bought from Walmart and then painted. I covered a headband in the same fabric as the shirt to have a perfect match, and made my own earrings.
The blouse was the only part fully handmade by me! It was done in peach skin with elastic and jersey knit for the top and bottom bands. I would really love to remake this outfit at some point, it's really cute, but I could have made it slightly better if I had the skills then that I have now!

Why Sheryl Nome?
This is really up there for obscure Sheryl Nome outfits, but even her casual "throwaway" looks that only get a few seconds of screen time look stunning! Plus this always just looked fun to make, I had been eyeing it for years, but recently looked over it again and was like "wait, I have everything I need to make this", so I did!
Even though I don't expect anyone to recognize this outfit (even if they are Macross Frontier fans, this one is not very memorable) I thought it would be a fun outfit to have for night time at conventions, or pre-gaming the day before the con officially starts haha. It's festive and fun, but a little understated and mature. It can also easily convert into streetwear if we decide to bounce the con and go out to a nice place, heehee! I love dual purpose costumes.
Costume Stats
Started: July 2021
Completed: July 2021
Status: active
Wig by: Amzcos Wig
Worn at: Phoenix Fan Fusion 2022, Anime Expo 2022
Awards: none
Pre-Made Pieces
The bra I had on hand, it's from Victoria's Secret originally. It's a comfy bra, and offers a decent amount of modesty, so it feels almost a bit like a bustier, really.
The silver bracelet is one I got from Kohl's forever ago, and the aqua bead bracelet I also made a while back, I forget for what. I think just because I liked the beads, that was it! So technically, I did make it, but so long ago now, that Imma just call it "pre-made" haha.
The boots I purchased online and got a great deal because they were marked as damaged. Although they don't match my armband and belt like I had hoped, I can't really be too picky for the price of $12 new haha! And the "damages" are so small you can't even see it really.
Lastly, the wig was sponsored by Amzcos Wigs, and it styled beautifully. I took inspiration from her hair style in Sayonara no Tsubasa, where she's wearing the red bubble dress. I love that little "flip" that her longer hair does over the side of her bangs, so attempted to incorporate that into this one. Also added a little more volume to the bangs.
If you're wondering about the earring, uh, I'll get back to you on that. This earring has plagued me for well over a decade at this point, haha! So hard to find the right parts for, but I think I'm close. ^_^
Construction Details
This was a relatively simple cosplay to assemble, and is also simple in concept, sooo I added a few fun details to spice it up a bit! I'll start with the main pieces first though.
The bra I had on hand, and I patterned and sewed the red low cut dress. To keep the red straps in place on top of the bra straps, I sewed little horizontal straps with red bra hooks that I harvested from an old bra I deconstructed forever ago. Sometimes it pays to be a pack rat haha. They fasten to the black bra strap, which also prevents the straps from sliding off my shoulders entirely. I'm actually amazed how well it stays in place. I can even adjust the height of the front and the back top by moving it up or down the bra straps. Nifty!
It's silly, but I really like my belt strap haha. All it is is one piece of woven ribbon with gold thread throughout to make it a little more eye-catching. To get the ribbon to wrap around me twice, but have only one end dangling down, I sewed a loop on one end of the ribbon for the other end to loop through. On the hanging end, I also put 5 gold gems that increase in size as you go down it. I really didn't want this piece to look like an afterthought, so I put a lot of intention in how it would look!
Same for the feather necklace. I had painted the ends purple, but it just wasn't "popping" against the red dress. So I decided to hand glue chunky glitter in two different colors to make a flashier design, and now it definitely commands more attention with its little flashes of sparkle. The brown cord is just one long string which ties in the front. I used Loctite Gel Control glue to affix the feather to the end of the cord, and also wrapped it in heat shrink tube for good measure. The tubing also gave the aqua color beads just the right amount of tension so sit above the feather without sliding off.
As for the arm bands, I didn't have the right stretch suede color that I had hoped for, but since I loved how the belt looked, I decided not to fuss about dyeing it darker, since it matched the belt anyways. The woven string is actually brown cord glued down in an X shape with Loctite glue. When I did a version where I sewed through the armbands, they came out very lumpy, and unhappy looking, nooo. Gluing them on gives me an effortlessly perfect look, every time!
The leg band stumped me for a bit, since there’s no clear image as to what it is or could be made of. I initially thought to use beads, but those would fall down from their weight and slick properties. I considered foam, but didn’t want something that would rip, or get destroyed by sitting on it, or being thrown in a bag when I inevitably get annoyed with it, haha! I remembered I had this old roll of gold foiled leather remnant that I picked up for next to nothing from a liquidation facility. I cut some 1” squares out of it, punched holes into the corners, and mended them together with jump rings. Although it will need fashion tape to keep it staying exactly where I want it, it actually can stay up by itself for a small amount of time.


