Make It With Momo: Create Pokemon Gym Leader Nessa's Logos, Part 2
- Momo Kariño
- Jun 25, 2019
- 5 min read
This is a continuation of my Nessa Logo tutorial for cosplayers! To view the first half of this tutorial, surf on over here to Part 1 and make sure to read up on all those Trainer Tips and item requirements first. After you've completed Part 1, come back here when you're ready to for the next steps! I decided to make Part 2 its own blog because it has a bit more steps in the process! This is where that can of paint, No-Sew Heat 'n' Bond, and piece of blue fabric will come into the project.


A Quick Note:

I realize this method is perhaps a little over-complicated, and sure there may be easier ways to do the logo. You may even be asking "why not just use printable transfer sheets"? which is a good idea in theory! In fact, I DID try it out but was not happy with the result and afraid of long term wear and tear.
I've never had great luck with printable heat transfer sheets in the past, but gave Avery's printable sheets a shot and well.... it went on somewhat unevenly, had a weird glaze to it, and of course... such poor tensile strength that I could it rip between my fingers with almost no effort. So that's why I decided to use something that I had faith in to hold up to more wears and washes! However, if the printable sheets work for you, then "work smarter not harder" is what I always say! ;3

Alternatively, you can opt to do the water drop logo as one solid shade of blue, (which I did on my first version of my shorts, since I knew I was going to remake them anyways), or even do something creative like make it holographic, or use multiple shades of blue heat transfer vinyl.
Whatever technique works for you is valid! This is simply how I achieved my design for Nessa, for those that perhaps hadn't thought of this way. There's always more than one way to make something!
Step 1: Prepare Your File to Cut
To create Nessa’s water drop/Zene logo, you’ll want to start with the fully white base (what we see as the outlines of the logo). The text will be done in the blue HTV, and the light blue water drop will be cut out of fabric and backed with Heat n Bond.
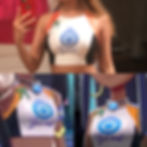
When designing in the program, make sure you have four elements: your white background, the blue text, the light blue water drop, and the white circle. Group these items together in the design space. Use the edit tool to adjust arrangement of the layers Once again, duplicate this grouped of images. One group will be for your shirt so it will be slightly larger. The other will be for your shorts. You may have print some scale tests again, and try on your top to determine where and how big you want these decals to be, as seen in the photo below.

Step 3: Cut Out Your Logos!
Cut out the white background (mirrored) and the circle in white HTV using the cutting machine (use the green mat). Next cut out the blue text, also mirrored, on the same green mat.
Next, switch to the fabric cutting mat (pink) and place the fabric smoothly down. Make sure no fabric is hanging off the edges, or else it might get caught up in the cutting machine.
Step 4: Remove Unwanted Vinyl
Peel away any vinyl that you do not want in your project, such as vinyl in the negative space of the image and outside the silhouette. Be gentle once again- some of the cursive letters can be tricky to work around. A weeding tool may help with this process. You can also use a pin to pull up small and difficult areas. Just try not to poke the parts you do want, though!
Step 5: Add Heat n Bond to the Fabric
Trace the fabric water drop to the paper side of the Heat n Bond. If your cutting machine also has a drawing feature, you can also have it draw or even cut the Heat n Bond out, but I personally can cut it faster by hand versus loading the mats up. Once you have cut out the shape, follow the Heat n Bond's instructions to apply the adhesive to the back of your fabric.
Leave the protective paper backing on the HNB adhesive until you are ready to iron it to the shirt. See the steps below for the order of cutting and application!
Step 5: Tape off Your Water Drop
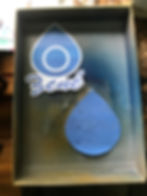
Find your fabric water drop, leaving the paper Heat n Bond backing on, and lightly adhere it to a flat and sturdy piece of cardboard, like a shoe box lid. Create some tape masking layers starting from the top of the water drop. Align these as best you can, with the bottom edge of the tape being where you want the line between the shades of blue to be- label it with Sharpie so you don’t get confused later! The next layer of tape will overlap this layer, so that's why it's easy to get confused. Repeat layering the tape until you have three total layers, and one exposed area of fabric at the bottom of the drop.

Step 6: Paint the Water Drop

Use Design Master spray paint and do one or two passes so that it is evenly colored. Don’t over saturate it- it will get hit with more pigment from painting the other layers. Let it dry for a bit (about 15 minutes) and then remove the next layer of tape.
Do one or two faster passes on this layer. Again let dry, and remove next layer of tape. For the second to last stripe, do a very quick and light spray. Let all of the stripes fully dry and then remove the last layer of tape. Use tissue or a white fabric scrap to remove any excess or loose spray pigment by gently dabbing the fabric. Then, remove your fabric applique from the cardboard, and head back to the iron!


Step 7: Iron Heat Transfer Vinyl to Garments
On the garment, use wool setting (305) to press on white backing. Make sure it’s perfectly centered before ironing. Use medium pressure and press for only 5-8 seconds in all areas until it is adhered enough that it doesn’t peel up with the clear sheet. Perform additional pressing if needed. Next, line up the blue text and place onto the garment. Use parchment paper to protect the rest of the already-adhered white vinyl. Press for 5-8 seconds with medium pressure. Let cool slightly if your product is warm peel. If text starts to pull up, press for a few more seconds until it is adhered.

Step 8: Apply Fabric Applique
Lastly, remove the paper backing from your Heat n Bond and place with the adhesive side down, onto the white vinyl background. Lay down parchment paper on top of all areas you're going to press, to protect the vinyl and your fabric. Press the applique on using the iron. Use medium pressure, and press for ten seconds. Let cool completely and check for any areas that come up. Repress in 5 second bursts as needed.

Step 9: Final Check!
Check all vinyl and fabric to see if any additional pressing is required. Do not over-press, or the HTV could shrink up. If desired, you can top stitch the edges of the fabric applique. It is not necessary to top stitch the heat transfer vinyl. Other than that, all of your Nessa logos should now be finished!

Creating Nessa's Logos is Complete!
There you have it! All about how I did my Nessa logos! Additional tutorials will be coming for other parts of her cosplay, such as how I did her shoe rings

Thanks so much for reading!


